CNC Laser Cutting and Engraving Basics
When I arrived at Arizona State University for Graduate school, the first digital process I experimented with was laser cutting & engraving. It’s a 2D operation and very easy for someone with only minimal digital skills. This post is just a brief overview of the process of laser cutting as I’ve applied it to art, since there are hundreds of more detailed videos and how-to articles on the web. Also whatever shop you’re working in should have a quick course on how to use your particular model. That said, I have done some experiments that involve laser etching ceramics and I’ll cover those results in a future article.
Basics: Raster vs vector images
One of the first things you’ll need to understand is the difference between a vector and raster image. Everyone is familiar with raster images. These are the jpg files that are created when you take a photo, and they’re made up of thousands of colored square pixels. The higher the resolution image the more pixels, but if you zoom in close enough you can always see little squares of color. Vectors curves, however, are mathematically based, so you can zoom in infinitely and you’ll never lose resolution.

What you can do on a laser with raster and vector images
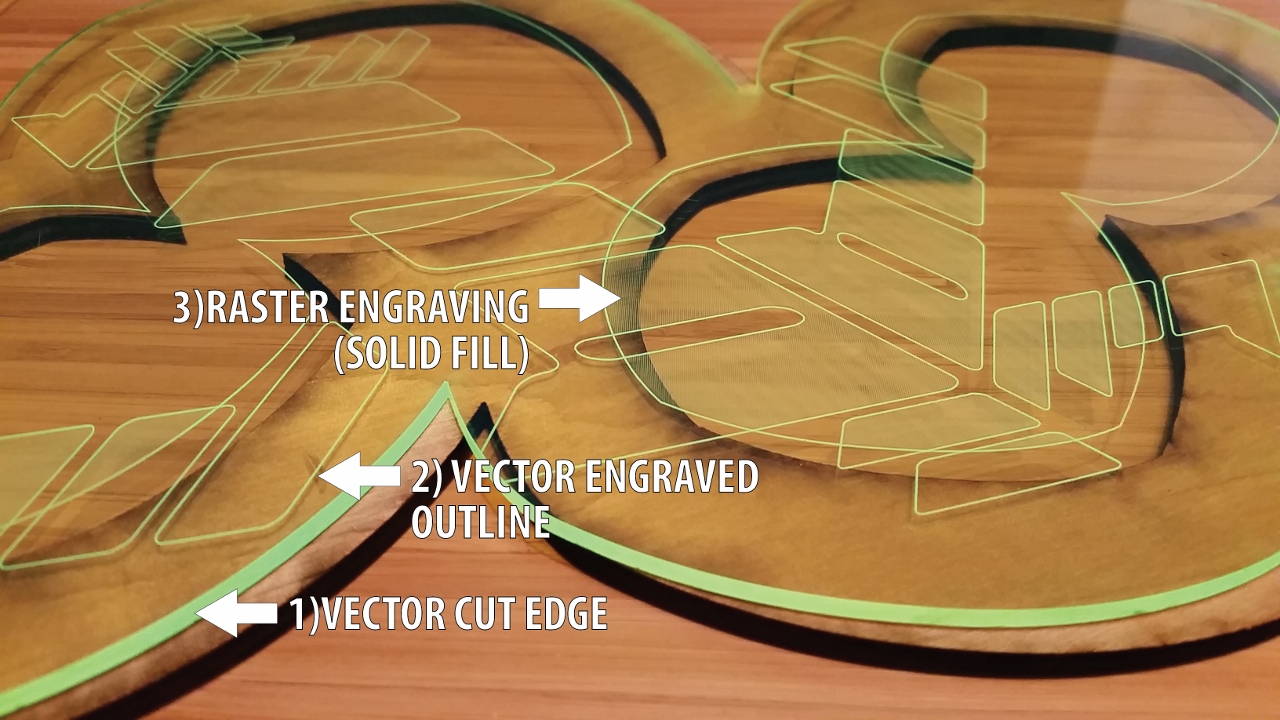
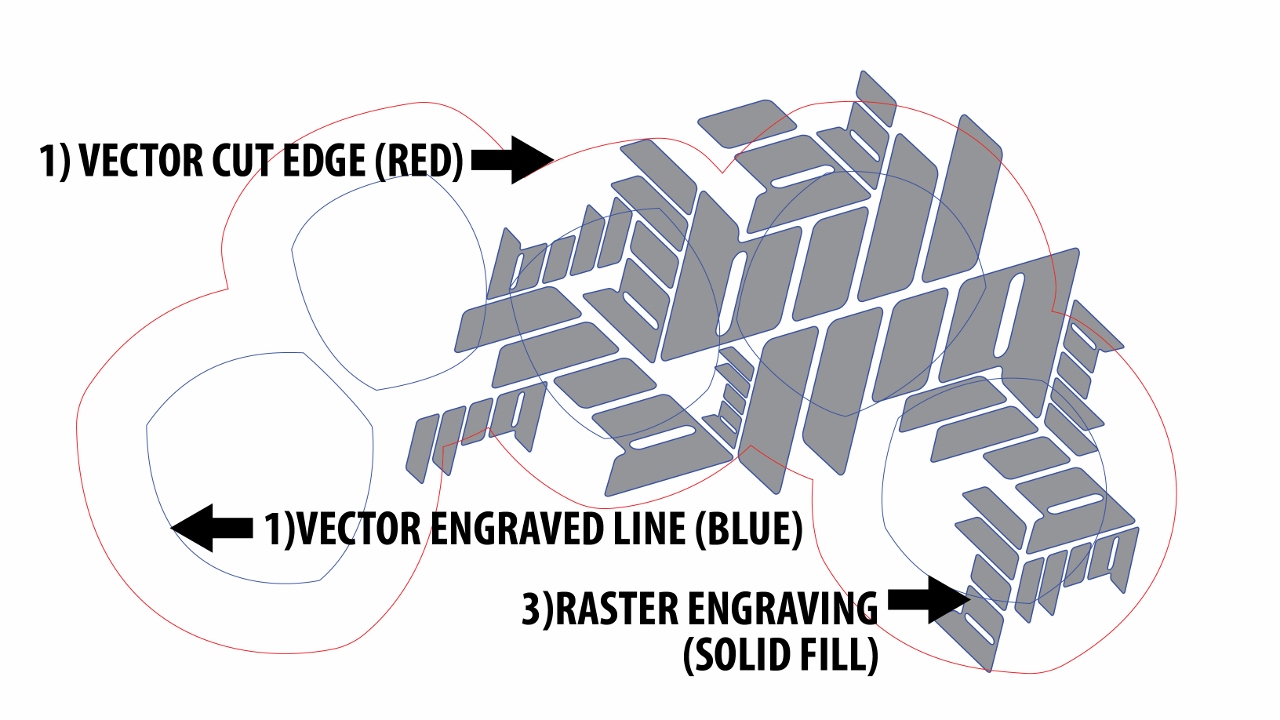
Why is this important? Because with raster and vector graphics and you can do three things on the laser; 1) cut completely through your material along a line, 2) engrave a very fine line (<1/100″) into your material, or 3) engrave a “grey-scale” type image with varying relief. The first two operations require vectors, and the last uses either vectors or raster imagery. Most lasers will easily cut and engrave softer materials like wood, acrylic (plexiglass), cardboard, and even chocolate. Although high powered commercial lasers can cut through hard materials such as steel, glass, and ceramics; the laser you’ll be using will probably only be able to engrave these materials. Safety note: DO NOT cut any PVC product. It will release toxic chlorine gas.
Setting up & cutting your file
I primarily use Adobe Illustrator with Universal Lasers, but my few experiences with Corel Draw and Epilog Lasers have been pretty similar. Basically you will tell the computer which of the three processes above you want the laser to perform by assigning your drawing different line colors and widths. For example, for a vector cut use a 0.001″ wide RGB Red line, and for a vector (fine line) engraving use a 0.001″ RGB Blue line. Any artwork that isn’t assigned as a vector cut or vector engraving be converted to greyscale and relief etched by default.
After that, cutting your image isn’t much harder than clicking print in Illustrator. It will help if you have your artboard set up to the size of your media (piece of plywood, acrylic, etc) but it’s not necessary. You will need to edit your “print preferences” which will adjust the laser power and bed height to accommodate your material type and thickness. You can ask your shop manager about these settings, and adjust them based on experience.
Getting access to a laser
This can be the tricky part to any digital process, but please don’t let it discourage you. As an example, on campus at ASU there are currently lasers in the Printmaking, Industrial Design, and Digital Culture departments. The requirements to accessing each of these varies, and usually takes getting to know the right person. Some require you taking class in their department, while others have very limited studio hours or charge by the minute. There are also restrictions regarding what materials can be cut, depending on their ventilation. For me the best option has been the TechShop, a for-profit maker space in Chandler, AZ that has free memberships for ASU Students. Laser time is free at TechShop, but offered only in two-hour blocks which fill up fast (since lasers are so cool and easy to use). The best advice I can give is to research all your available options and make it work. If you have limited time, make sure to come with your files setup and ready to go.
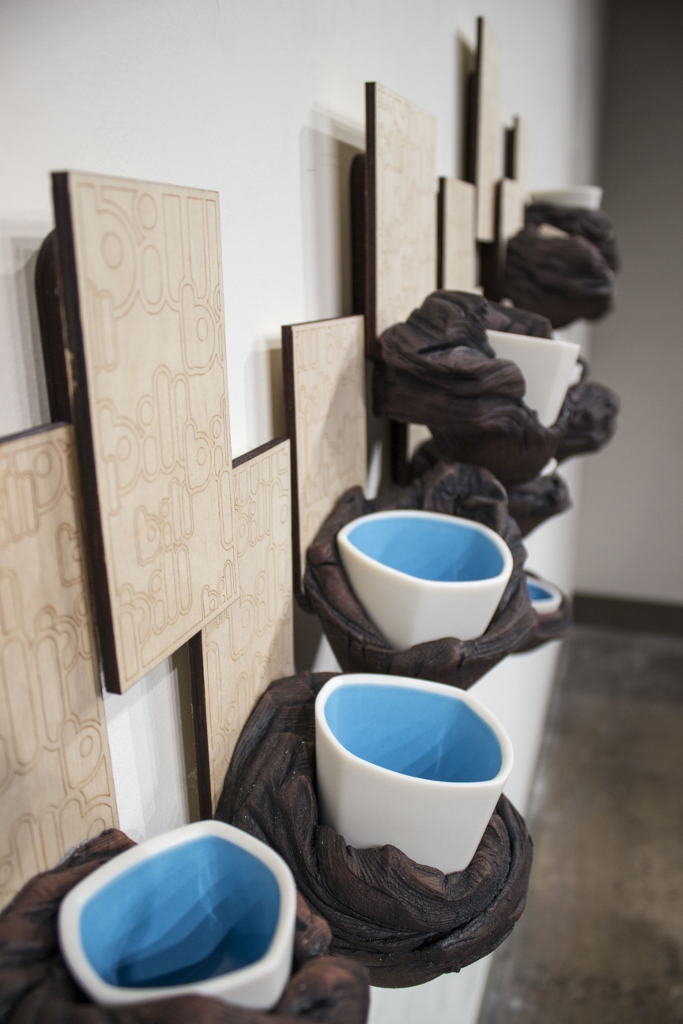
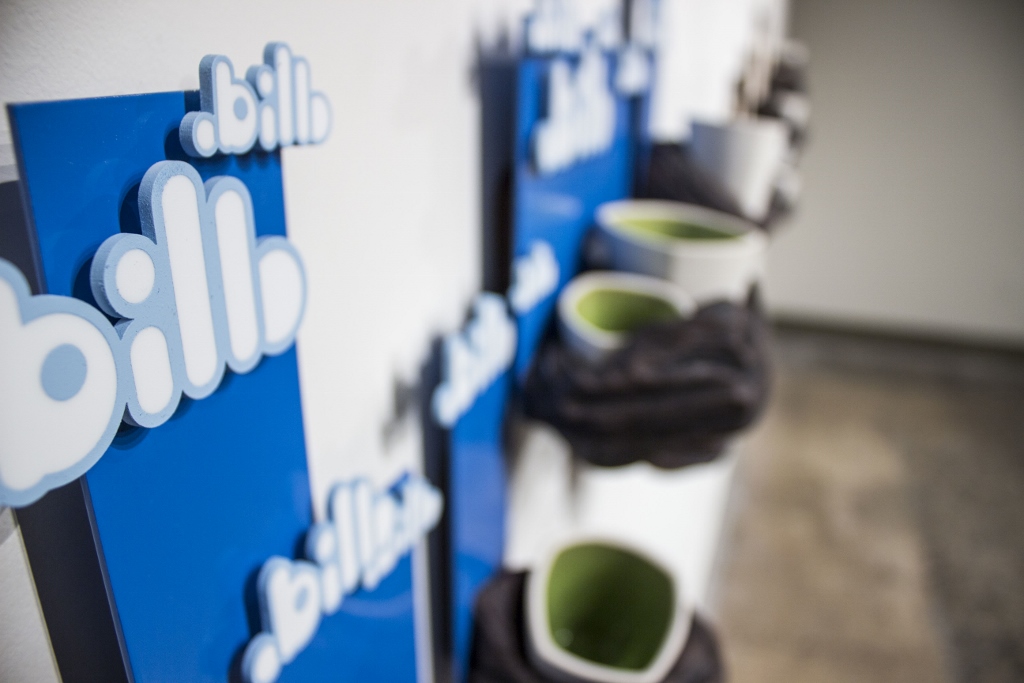
Examples
Below are some examples of the work I’ve made on the laser. The captions include details of my exact method. Click an image see more of that pieces. If you have any questions about laser cutting or any of the work shown about, please feel free to contact me and I’ll try to help you as best I can. -Bill